You can add new users both through the Picvario interface and admin panel. Manage access rules is only possible in the admin panel.
Creating a new user in the Picvario interface
1. In the Picvario interface go to User profile — System settings — User management — Users.
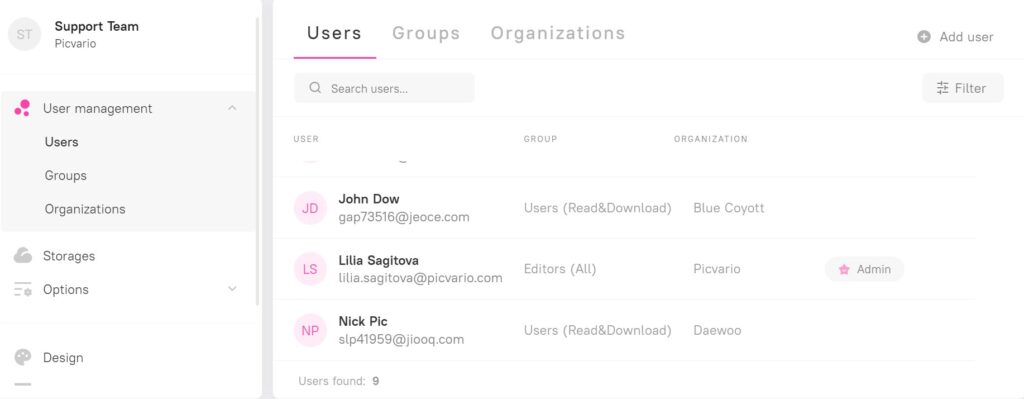
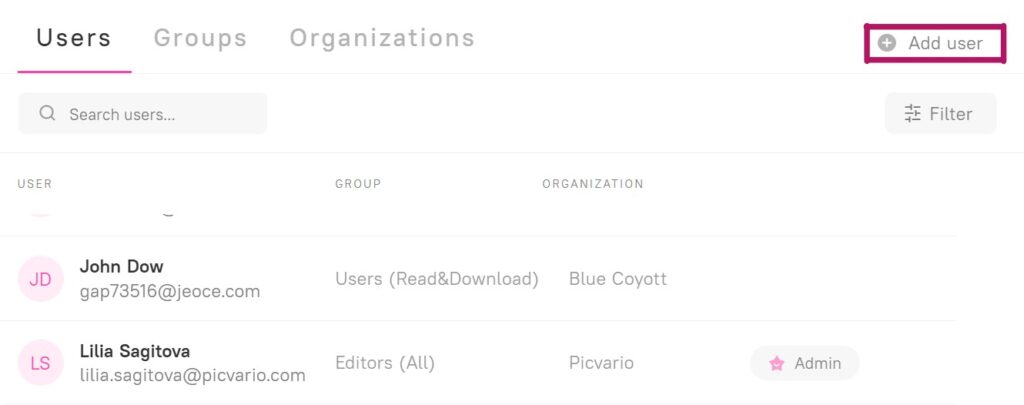
2. To add a new user click on +Add user.
3. A new user card opens.
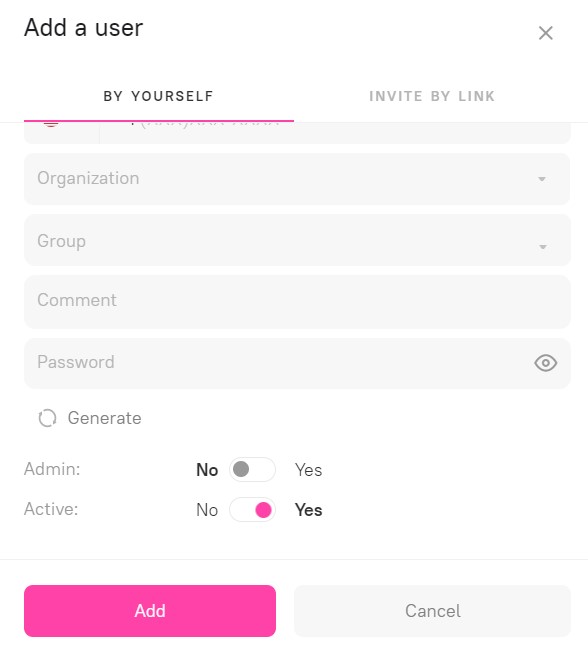
4. Fill in name, surname, email address and other necessary information. Set a password or click Generate.
Admin status grants the user all the rights in both the admin and user interfaces. This status allows the user to view and edit all assets and collections, as well as to perform all actions in the admin panel.
Active toggle shows the current status of the user. When turning on, the user is active and authorized to use the system. When is turned off, the access right is suspended. Deactivating the Active status does not lead to the deletion of the user’s account, it can be reactivated at any time.
5. Press Save.
Invite link
Administrator can add a new user himself or send a user an invitation link. To create an invite link, go to the Invite by link tab.
Switch on the Allow self-registration of users toggle and copy invitation link.
By following the link, a user can register and get access to your Picvario workspace. After the registration, they fall into the default group with the access rights you defined for this group.
Admins get notification by e-mail after each new registration.
Creating a new user in the admin panel
1. Open the Users panel in the admin console and then click on Users or Change.

2. Click on the Add User button.

3. Fill in the required fields in the Add User. Enter the new user’s email address and set a password. Confirm the password and click on the Save button.

4. Once the password has been confirmed, a new user card opens to complete the new user’s details.
Note that the Personal Info fields are optional. If completed, the new user’s first and last names will be displayed in their personal interface, if not — the user’s will be identified with their login (email).
The Permissions panel allows configuring the user’s status
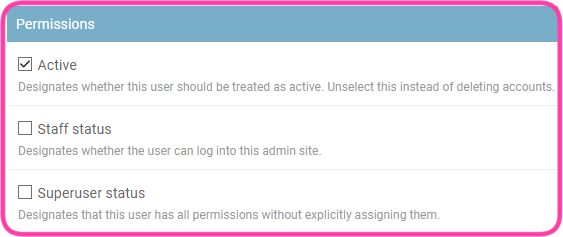
- Active — the Active box shows the current status of the user. When it is ticked, the user is active and authorized to use the system. When the tick is removed, the access right is suspended. Removing the tick does not lead to the deletion of the user’s account, it can be reactivated at any time.
- Staff status — a user with this status is granted access to the admin console, although it does not mean an automatic provision of admin rights. These are configured in the Admin panel permissions panel (see below).
- Superuser status — admin status. Ticking this box grants the user all the rights in both the admin and user interfaces. If you want to create a user with the admin status, tick both Staff status and Superuser status boxes.
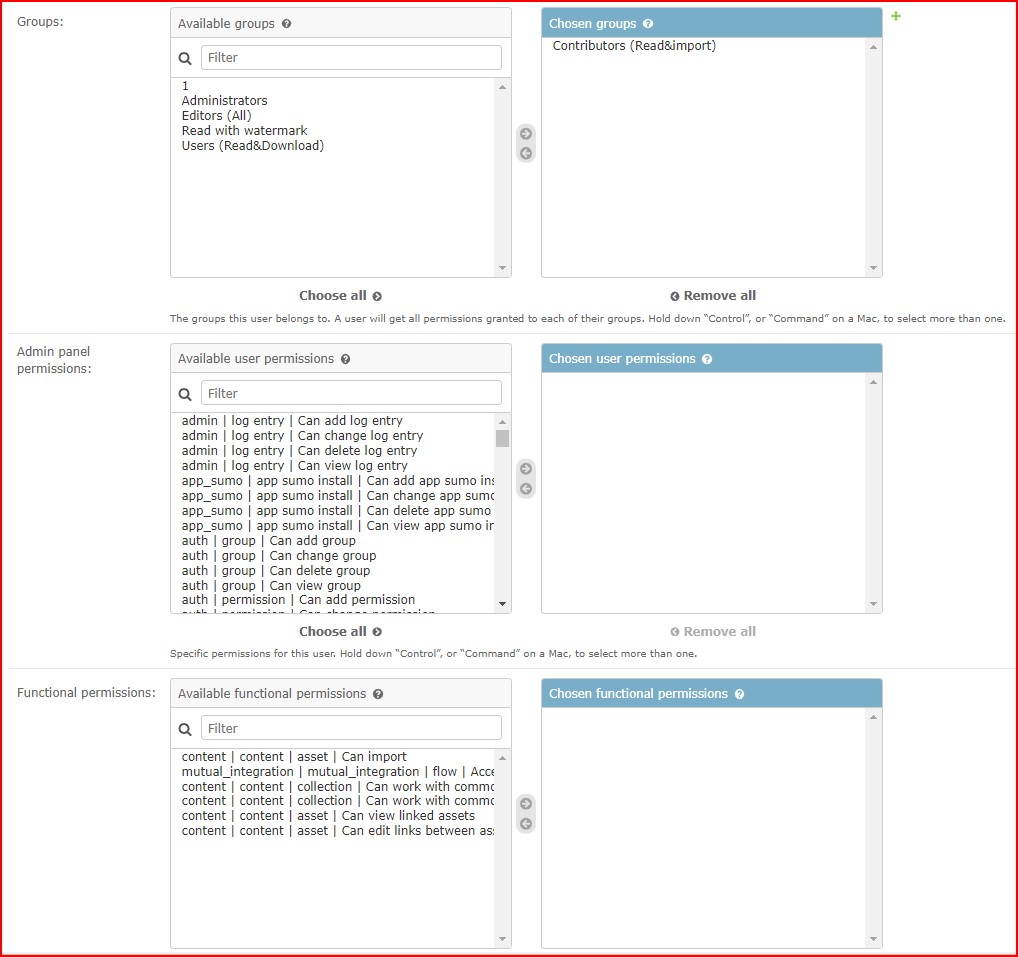
The Groups panel serves to make the user part of one or more groups. Being part of a group means sharing the rights assigned to all the members of the group. The access rights of each individual user can also be configured through access rules. For more details refer to — Managing User Groups and Managing Access Rules.
Admin panel permissions panel — use this panel to specify what admin rights are granted to users with access to the admin panel (with a tick in the Staff status box). Leave this panel blank if you create a user with access to the user interface only. Rights on actions in the UI are managed through Access rules.
The Functional permissions panel — in this section, the user can be granted access rights, similar to the rights that are assigned to groups. — Managing User Groups.
Save your settings by clicking on Save.
Deleting a user
![]() When a user is deleted, all system objects associated with them are deleted as well: assets, collections, property values of assets and collections, and more. Therefore, the user deletion function is unavailable.
When a user is deleted, all system objects associated with them are deleted as well: assets, collections, property values of assets and collections, and more. Therefore, the user deletion function is unavailable.
If you need to deny system access to a user, use the deactivation function to avoid losing content associated with that user. To deactivate a user:
1. In the Picvario interface. Go to User profile — System settings — Users.
2. Select the user.
3. Turn off the «Active» toggle.
4. Click Save.
Configuring User Rights
A new user, if they neither have Superuser status (is not an administrator) nor belong to any user group for which access rights are configured, has the following set of rights after being added to the system:
- able to view public assets and all their properties
To further configure the rights of a new user go to Access Rules.
Alternatively, rights can be configured for groups of users or organizations. This allows granting a preconfigured set of rights to new users simply by adding them to a specific group/organization.
The users’ rights are a combination of personal rights, group rights and organization rights.