Getting Started With The Picvario Interface
If you are just getting started with Picvario, this guide will help give you an overview of the system's basic components and start using it sooner.
The system's main components are the asset feed (1), the navigation bar (2), the right-hand sidebar of properties and actions (3)
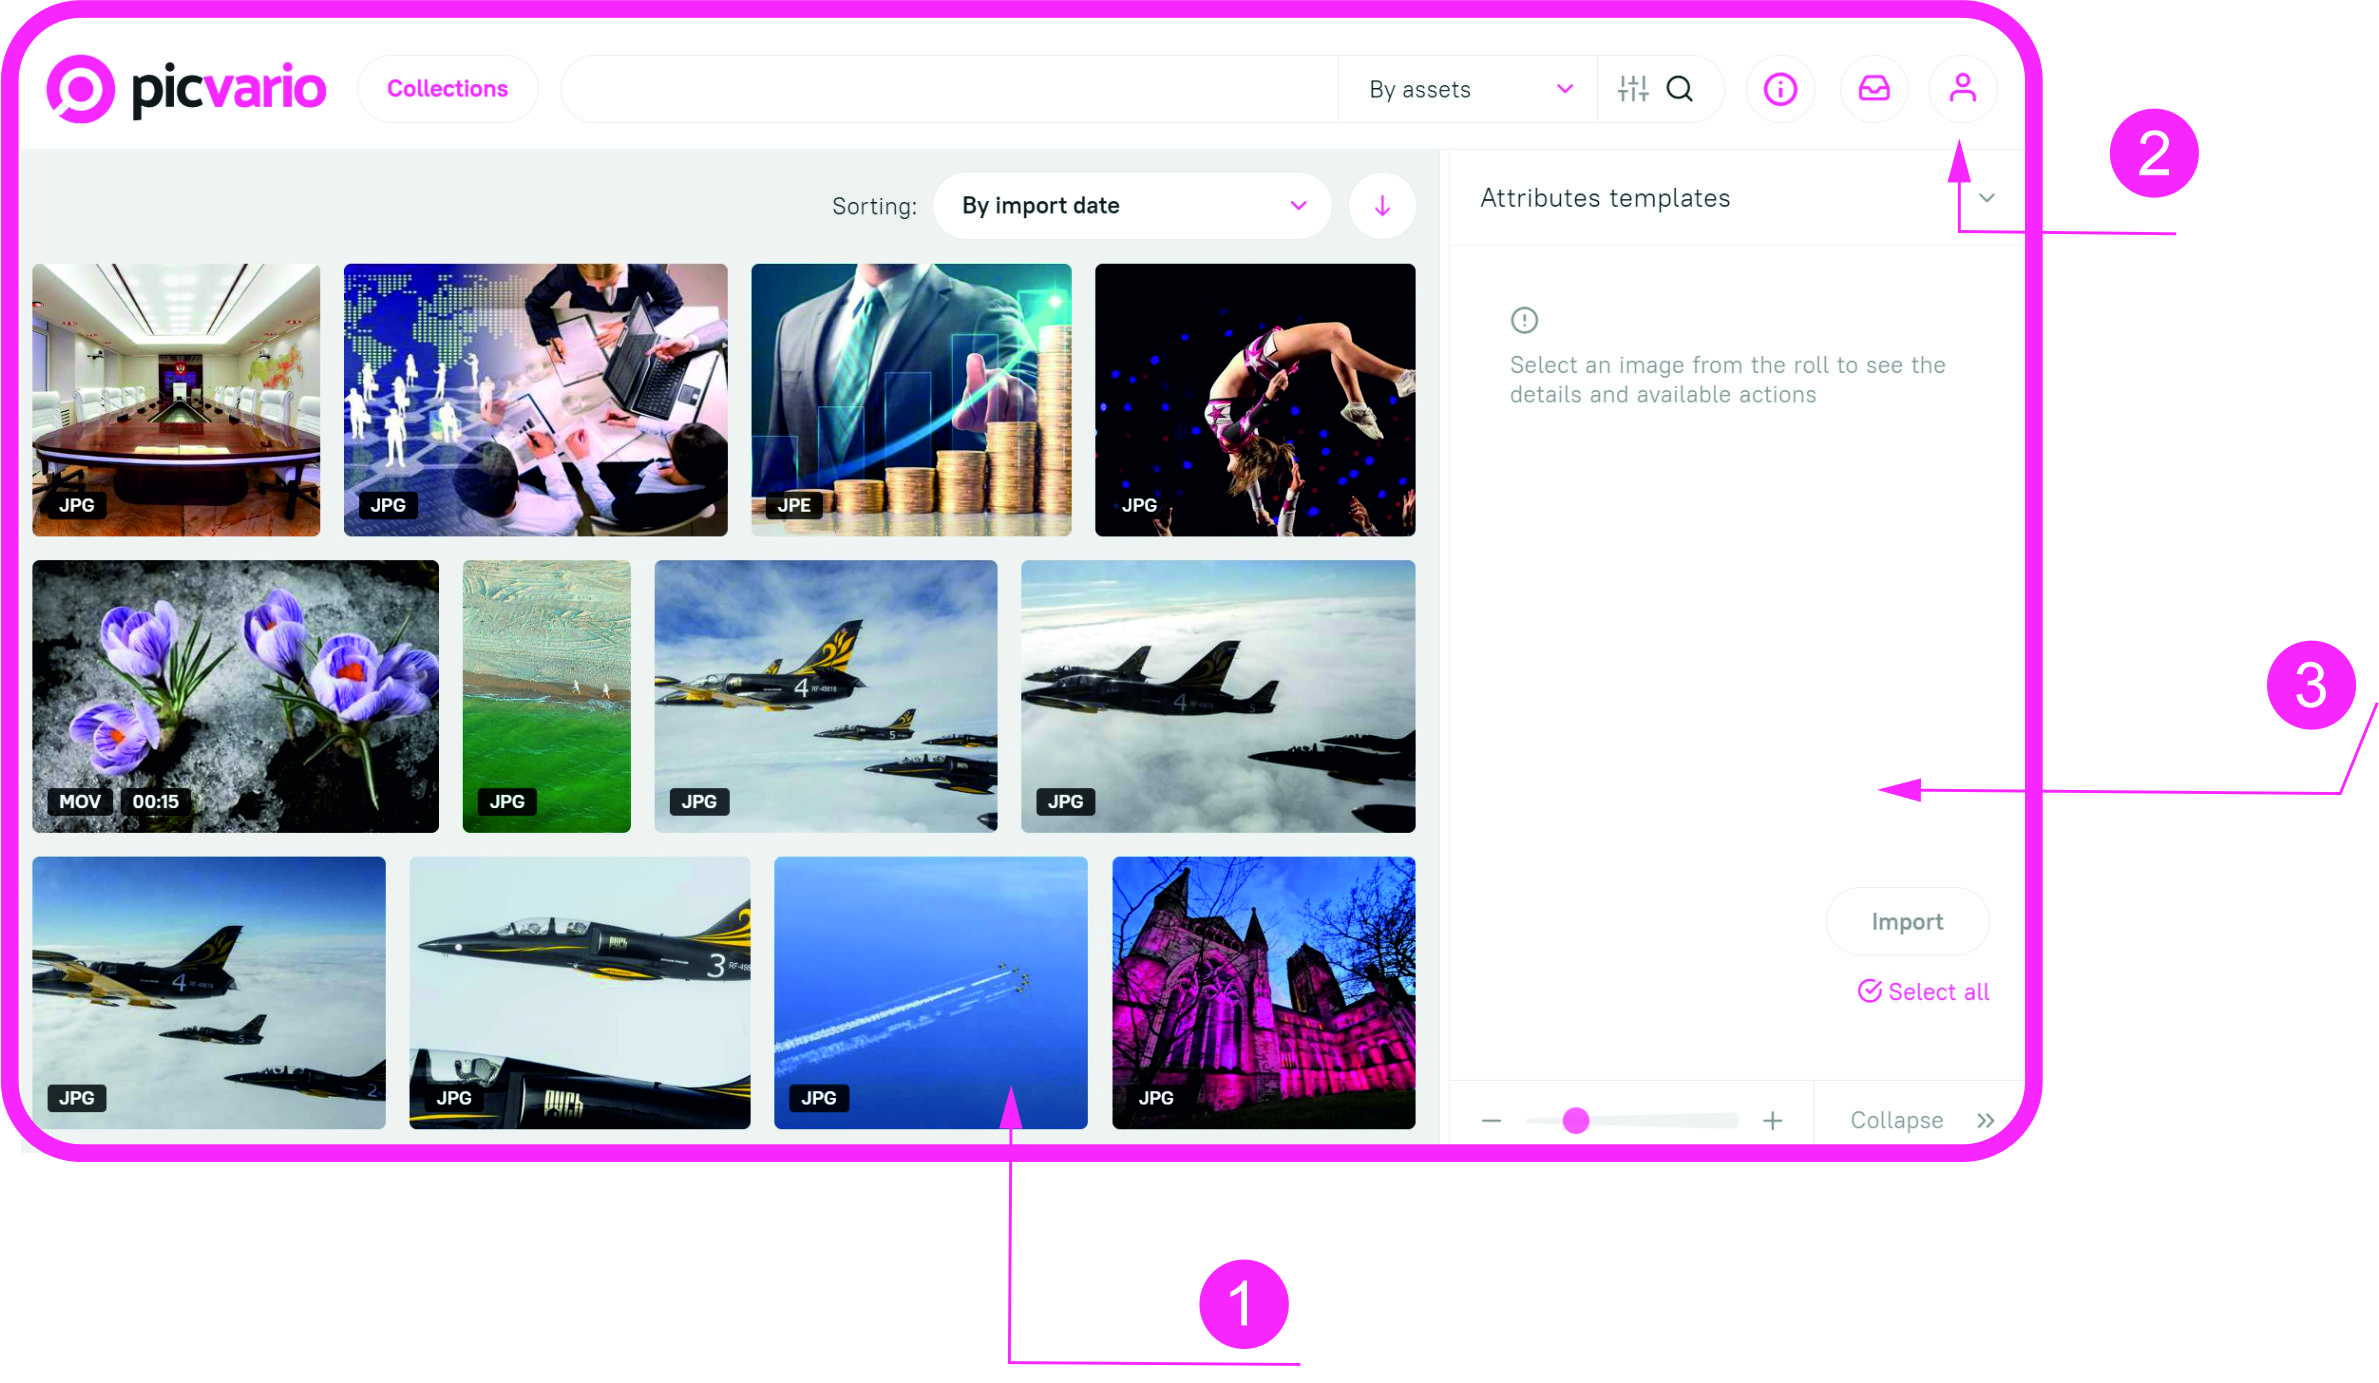
Asset feed
The Asset feed shows all files uploaded to the system - photos, videos, audio, documents, vector images, archives, etc.
You can view the asset feed by clicking on the logo in the top left corner or on the asset/collections menu next to it.
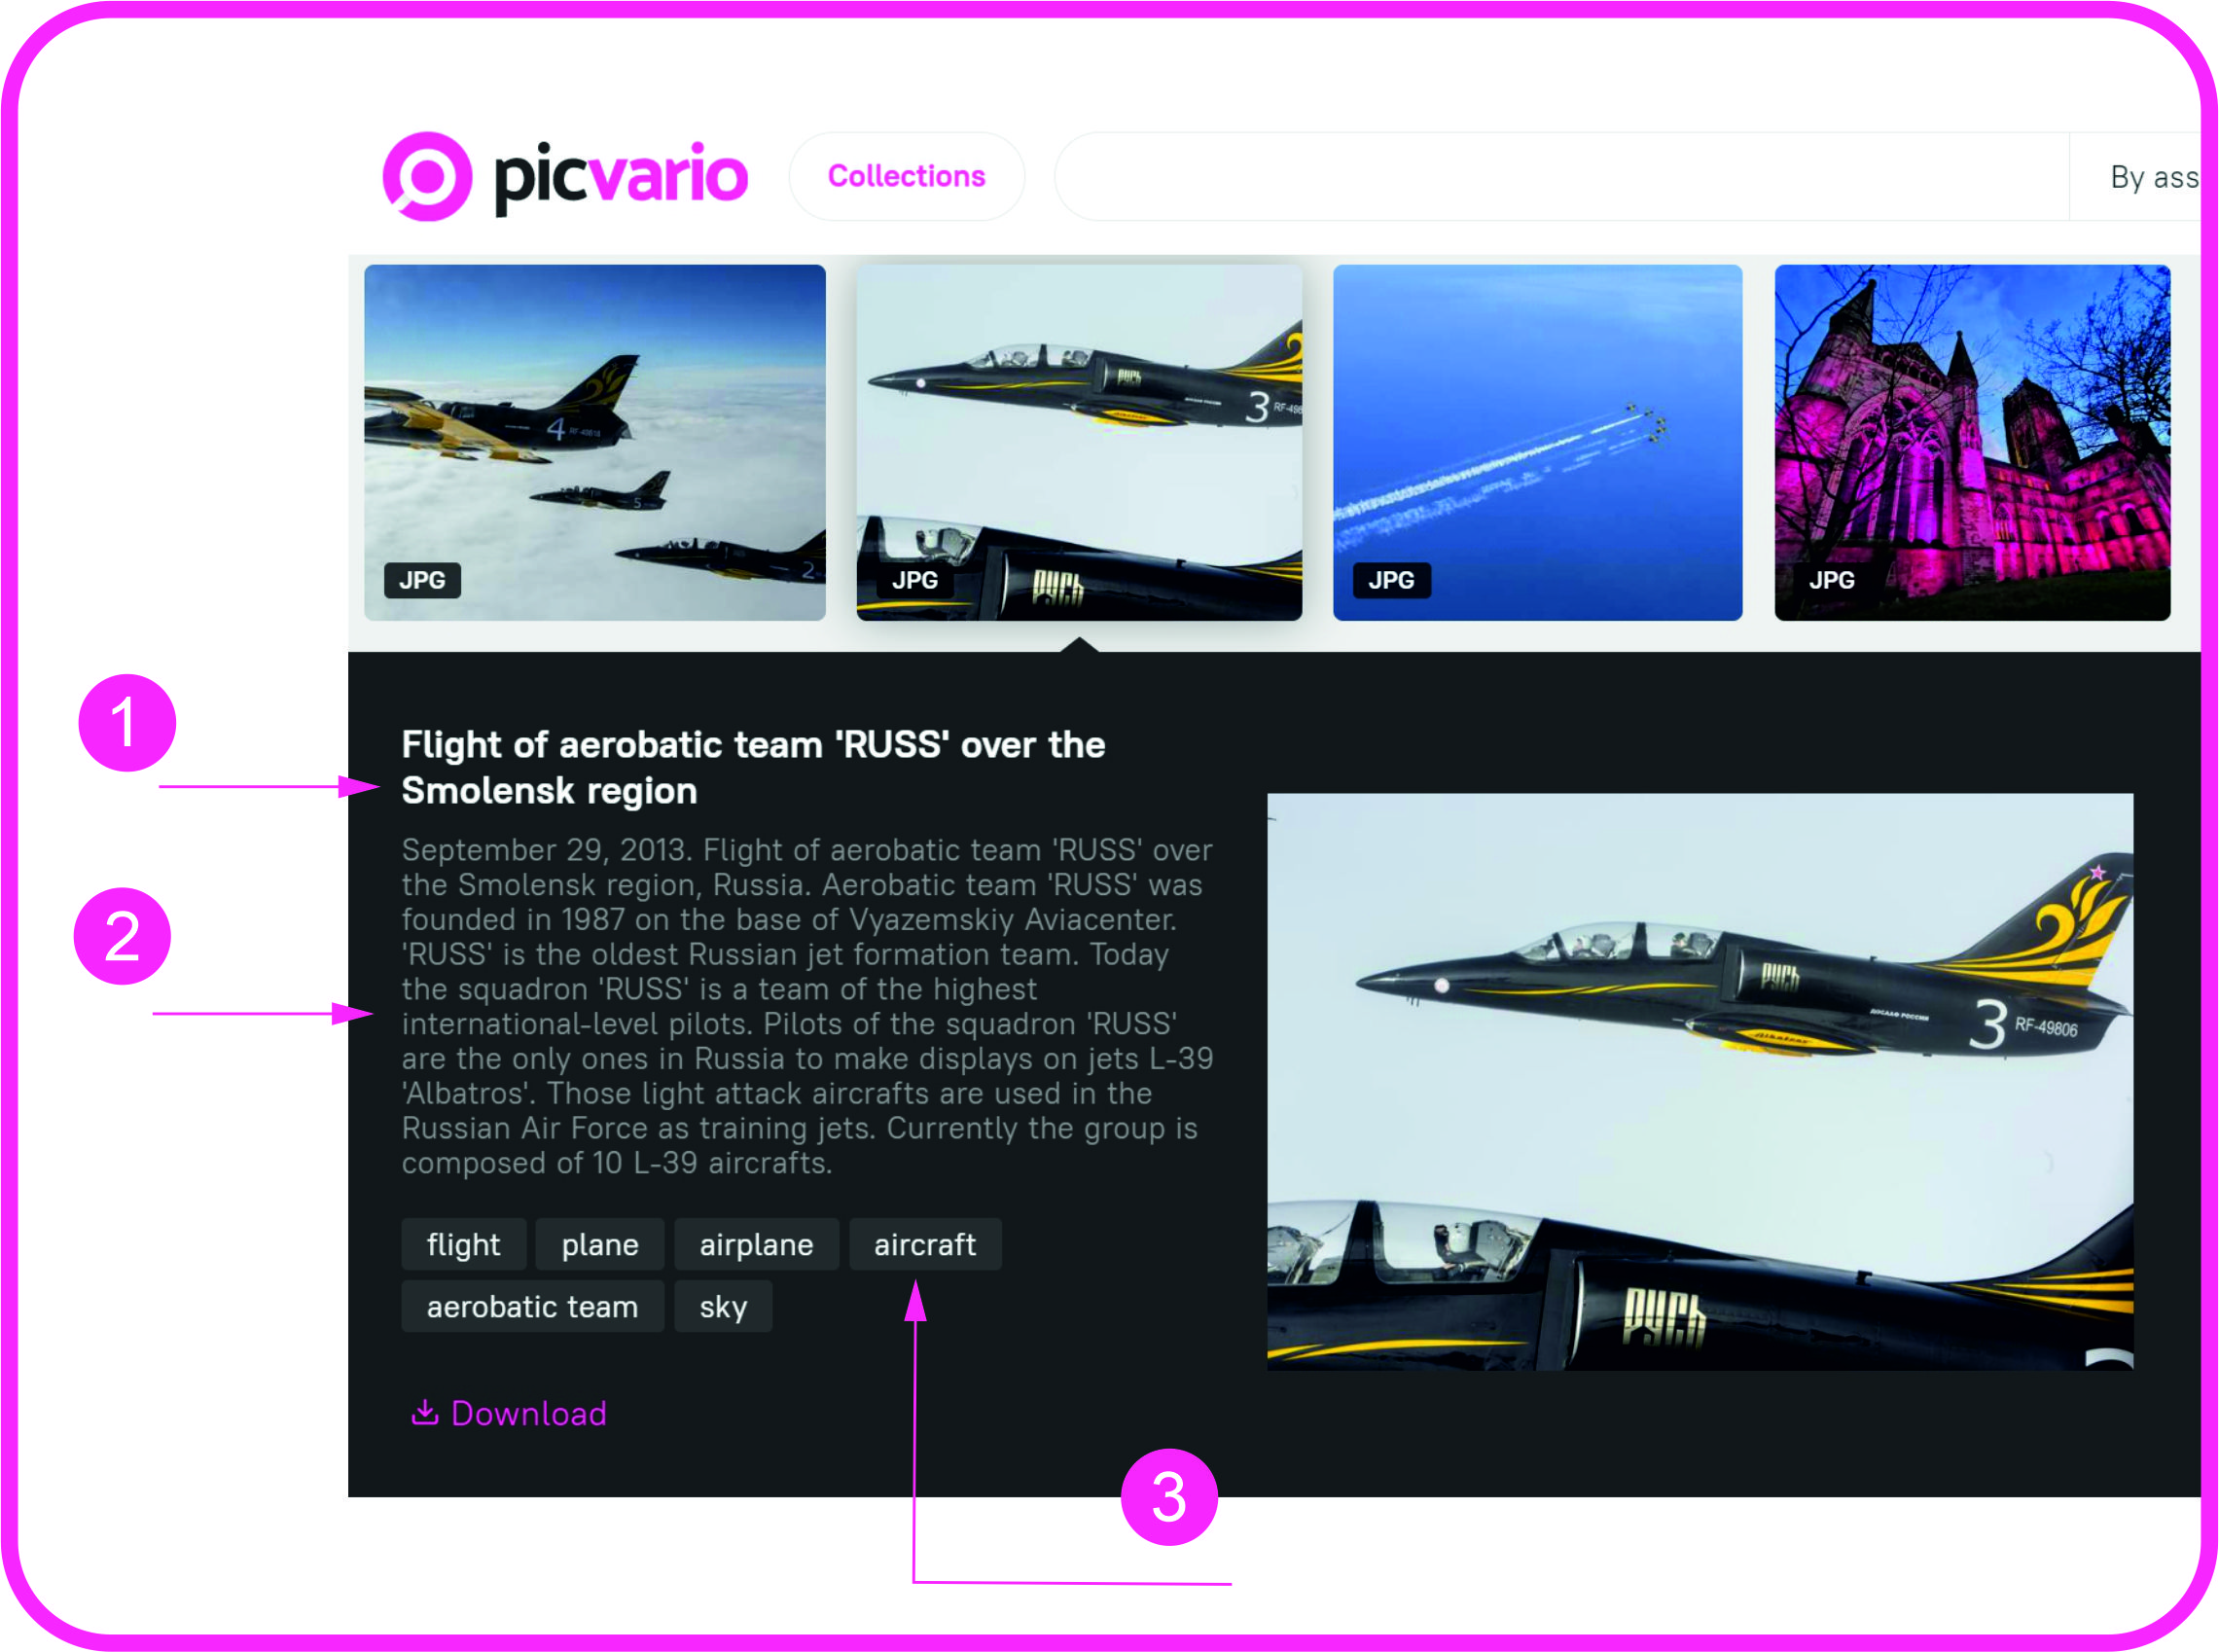
To open an asset's detailed view with title (1), description (2), and tags (3) just double-click on the asset thumbnail.
To download an asset, click on the Download button and select the required file size. To download multiple assets, first select them by clicking the thumbnails with the Shift key or Ctrl/Command key pressed. Then, open the Export section on the right sidebar and select Download.
To upload new files into the system, simply drag and drop them into the asset feed or click on the Import button at the top of the asset feed.
Sidebar of Properties and Actions
If you select an asset by clicking on it, in the right-hand sidebar you will see a list of available actions which can be applied to the selected asset.
Under Properties, you can see and edit the metadata.
In the Property Templates section, you can create templates to avoid the input of repetitive data, such as copyright or creator’s name, for example.
The Persons tab allows you to add or edit names of people appearing in photos so that the artificial intelligence system could identify them wherever they are presented.
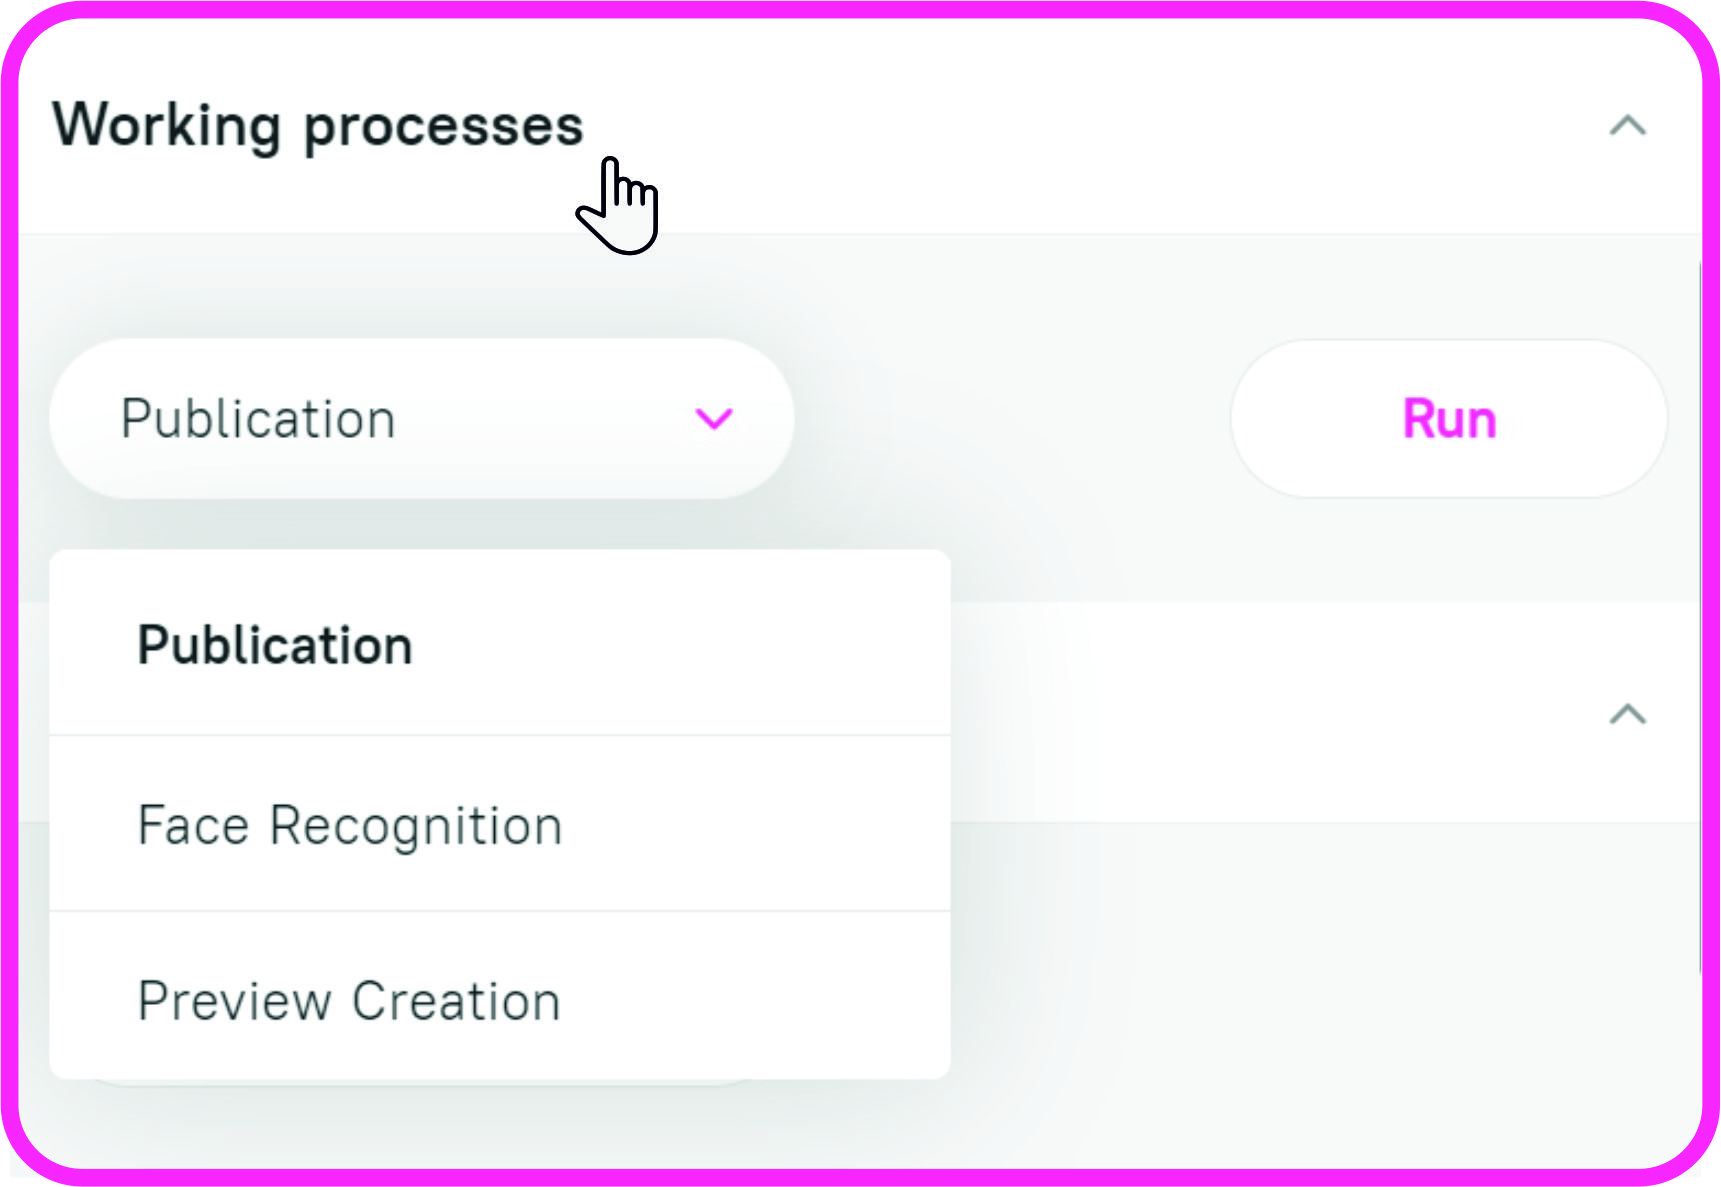
In the Workflows section, you can manually start some of the system's automatic functions.
Under Export, you can either download multiple assets or export them to a designated FTP server.

To share assets with non-Picvario users, go to the Share tab and create a link to one or a few of assets you want to share.
Navigation Bar
Use the block at the top of the page to navigate the system.
You can access the asset feed by clicking on the logo in the top left-hand corner or on the Asset/Collection selection menu next to it.
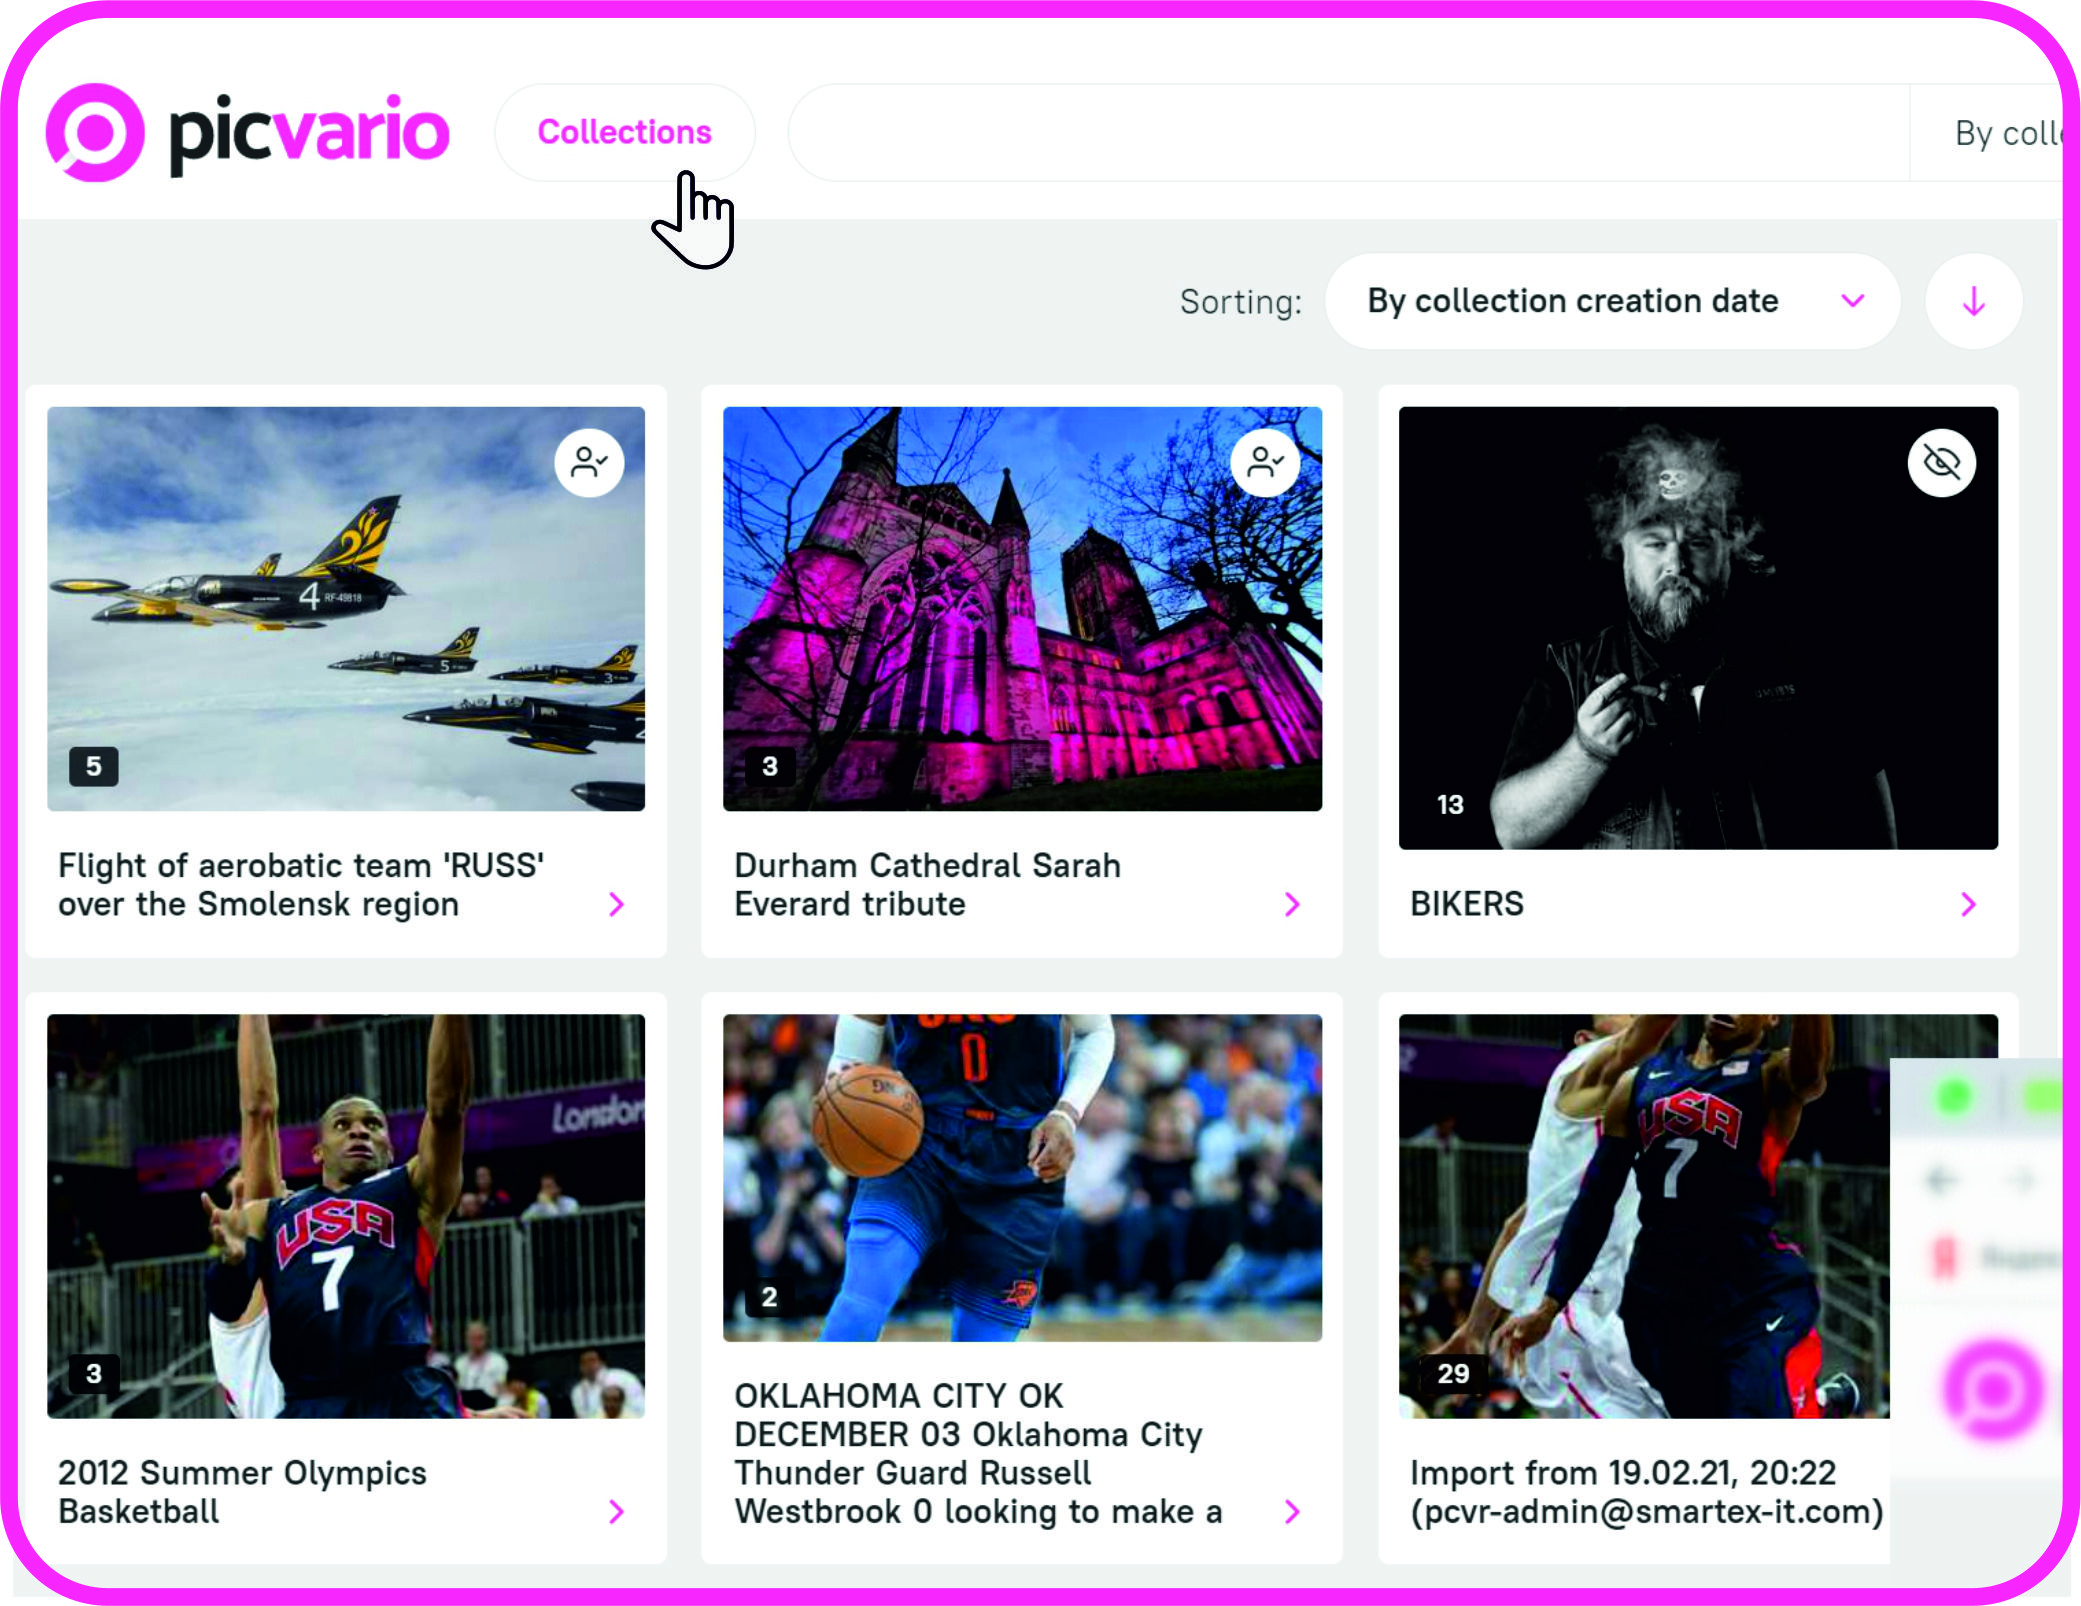
Collections
Assets in the system can be gathered in groups, which are called collections. To view a list of collections, click on Collections in the Asset/Collection selection menu.
Search
The search field allows you to search assets using metadata and filters. To search, type in a keyword or another value in the field and press the Enter key.
To filter assets, click on theicon to open the filter panel.
Information
Click this to see the current build of Picvario. You can also find here the link to the help center and the e-mail address of our support team.
Task List
The list displays the last 5 tasks you have started and their status.
User Profile
The profile usually displays the name/surname of the user whose account has been logged in and a logout button. For those users with Admin status, as it is shown above, two more options are available: System Settings and Statistics related to asset downloads.
Related Articles
How to Hide Properties from the Picvario Interface
You can hide metadata properties that you don't use from the Picvario interface (the right sidebar). To do so: 1. Go to Home › Content › Props. 2. Locate IS HIDDEN column. 3. Check the checkbox in front of the property you want to hide. 4. Press ...Picvario: Taxonomy
Taxonomy is a hierarchical/tree-like label structure and a useful tool for organizing content. A simple example of taxonomy is organizing files into folders in Windows Explorer. Taxonomy trees can be created by system administrators only. Once ...Picvario: Taxonomy Tree
A taxonomy is a hierarchical/nested structure that helps organize content. A simple example of taxonomy is organizing files into folders in Windows Explorer. Creating a taxonomy tree To create a taxonomy tree, go to the Taxonomy section of the ...Picvario: System Options
Users with admin rights are able to manage import restrictions and other system settings. For editing the options, go to System Settings > Options > Main. Maximum number of files when importing via web browser. The default value is set to 100. This ...Picvario: Managing Users
You can add new users both through the Picvario interface and admin panel. Manage access rules is only possible in the admin panel. Creating a new user in the Picvario interface In the Picvario interface go to User profile - System settings — User ...